If you're going to do any electrical work at all on your rig, it really pays to have a multimeter. Sure, you can do some basic "does it have 12V?" checking with a light-up probe, but if you want to test 120VAC outlets, check fuses and light bulbs, and do lots of other common tasks, you need a meter. Fortunately, it doesn't have to be expensive—and more important, you don't have to be an engineer to use it! Here's the multimeter that I use most often: Radio Shack's #22-820. This product seems to be discontinued, but if you see one at a yard sale or on eBay, snag it! (But with that said, most of what follows will apply to any digital multimeter.)
Here it is life size:
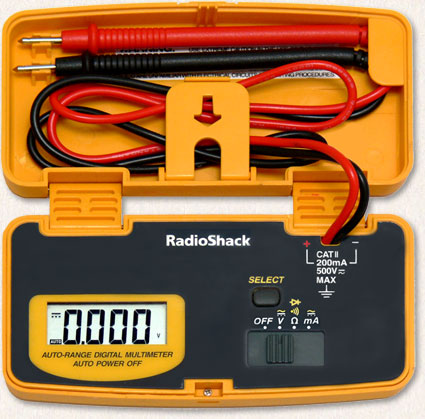
Notice how the test probes and leads are permanently attached, and store neatly inside the case, so they can't get tangled up and damaged—or lost. Also notice that the main switch has only four positions, not twenty: OFF, V, Ω (ohms) and mA. (You can ignore the squiggles above those labels, with one very useful exception that we'll get to in a little bit.)
Better still, I'll tell you right now that you will seldom if ever need to measure milliamps (especially since this little meter is limited to 200 mA maximum), so really you just have two settings to deal with: volts and ohms. Voltage and resistance. Think you can handle that? Good! Let's look at some typical examples of how you'd use a meter like this to do everyday checks.
Checking AC voltage
It's roasting hot outside, your air conditioner is running full blast, and so is everybody else's in the campground. You're relaxing inside, trying to keep cool, when a breaker pops and the air conditioner stops. Dang!
After waiting the standard two minutes to let the compressor recover (restarting right away could damage it), you reset the breaker and turn the air conditioner back on... but it just groans dismally and then pops the breaker again. Oh, no—is the unit kaput?

Before jumping to any expensive conclusions, pull out your meter, set it to volts, and carefully insert the probes into any household outlet. Aha! The campground AC voltage is down to 107.3—too low for an air conditioner to function well. (With an RV air conditioner, anything below 110V is pushing your luck.) At low voltages like this, it'll try to pull more current to make up for the reduced voltage... but that trips the breaker.
Well, there's not much you can do aside from complaining to the campground's owner, but at least you know you're not facing a multi-hundred-dollar repair bill... thanks to your trusty meter!
Testing small batteries
How good are the batteries in your flashlight? Your walkie talkie? Your digital camera? You can find out with your multimeter.
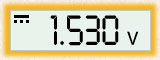
A new alkaline battery in AAA, AA, C or D size should show about 1.5–1.6V. However, rechargeable (NiCd or NiMH) batteries in these sizes will show only about 1.2–1.3V when fully charged. A new 9V alkaline battery should show about 9.5V, while a fully charged 9V NiCd or NiMH battery will show only about 7.5V.
You're probably wondering, "At what percentage of that voltage is a battery considered 'bad'?" There's no simple answer to that question, because it depends on the device you're planning to use it in. For example, AA batteries that are down to 1.1V will still do reasonably well in an LED flashlight or a small radio, because the current drain is so small, and because you don't usually mind a slight reduction in light or sound output. Put those same mostly-drained batteries in a portable CD player, though, and you'll find it doesn't work too well.
The bottom line is that you'll have to use a little judgment, but that meter still makes a pretty good small-battery tester!
What about big batteries?
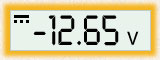
Of course, you can also use your multimeter to check your RV's 12 V electrical system. Just set the switch to volts, then put one probe on the outer shell of a 12V outlet and one on the center terminal. The shell is always negative, so use your black probe there. Likewise, the center is always positive, so use your red probe for that one. (Be careful not to short the two together, or you'll blow a fuse.) If you have your colors correct and your meter shows a minus sign (e.g., -12.65V), that outlet is wired backward. It'll work OK with light bulbs, but probably not LEDs. And it's likely to damage electronic equipment such as inverters and computers. Better fix it!
12V wiring tests
There's another thing you can learn from checking battery voltages. Try testing the voltage at a 12V outlet near your RV's house batteries—or better still, at the battery terminals themselves—and then check the voltage at the furthest outlet from that point that you can find. The two won't be identical, but they should be within a couple tenths of a volt of each other. If you see, say, 12.6V at the outlet near the batteries, but only 11.9V at the distant outlet, you have a problem.
It could be inadequate wiring—some manufacturers try to save money by using skimpy wire—or it could be a bad connection that isn't passing the power along the way it should. Either way, it's something you should fix if you can. Until you do, don't try running any heavy loads, such as inverters or 12V curling irons, from that low-voltage outlet! At best, they won't work well. At worst, you could start a fire in your wiring.

Hot stuff
A fire? Yes, either a bad connection or inadequate wiring, combined with heavy power use, can cause a fire. Maybe you think of electrical fires as having to do with sparks and Hollywood-style pyrotechnics when wires short together, but that's actually the least likely scenario.
Most electrical fires are caused by overheating—slow, but deadly once it reaches the ignition point. And overheating is most often caused by one of two things: trying to push current through a wire that can't handle it, and trying to push current through a bad connection. When all the juice has to pass through a tiny contact area, because the rest of the connection is loose or corroded, that tiny spot gets HOT!
Once the insulation starts to char, you're seconds away from a fire... and minutes away from losing your rig. A fire can burn your RV to the ground in less than five minutes, and RV fire expert "Mac" McCoy says that 70% of all RV fires start in 12V wiring. Yes, fuses and circuit breakers are supposed to protect you... but what most folks don't realize is that they are mainly effective against short circuits or sudden, massive overloads. However, a slow buildup of heat can start a fire without triggering any reaction from a fuse or circuit breaker. So make sure your wiring is good!
Light bulbs
But let's get back to what you can do with your multimeter. One common task is checking light bulbs—incandescent ones, I mean. (You can't test fluorescent bulbs with a meter.) Have you ever run into a situation where a lamp stops working, but when you look at the filament, it seems OK? So... is it a bad bulb, a corroded socket, or something else, like a blown fuse?
Time to change settings on your meter: move the switch to Ω (ohms). Now you're measuring resistance—how hard it is to push electrons through those wires. IMPORTANT: never connect to a live circuit when you're on this setting, or you could damage the meter. Use the ohms setting only for measuring things like light bulbs and fuses that have been removed from their sockets and are unpowered.

When you switch to ohms, some meters will display "----" or "Ovr". Mine shows "OF" (for "overflow," I suppose). These indications all mean the same thing: resistance between the probes is too high to measure. In other words, the circuit is "open"—not connected. Now touch the probes together just to test them. You should see either "0" or very close to it. That's a short circuit you're looking at: straight from one probe to the other, with no resistance in between. Now let's look at that light bulb.
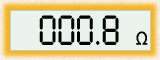
Touch one probe to the base of the light bulb, and the other to the nipple at its bottom. (If it has two nipples, as some taillight bulbs do, test one at a time, measuring between nipple and base.) A 12V bulb such as the common #1147 type should show a little less than an ohm resistance; in this case, I measured eight tenths of an ohm. If the reading you get is very high or infinite ("OF"), then you know that the bulb is no good. Either there's a tiny break in the filament, or the connections between the filament and base have come loose. (It happens sometimes, especially with cheap bulbs.) On the other hand, if you get a zero reading, then the bulb is internally shorted out.
But if you see somewhere between .8 and .6 ohms, then the bulb is good, and you're going to have to start troubleshooting the switch, socket and fuse. We've already talked about how to measure 12V circuits. (Don't forget to switch back to the "V" setting before you measure voltages!) Stick the probes in the light socket, flick the switch and see whether you have 12V. If not, you probably have either a bad switch or a bad fuse. Let's talk about fuses.

Fuses
Here's where we get to use a nifty extra feature on this Radio Shack meter: the continuity beeper. (Your meter may have one too.) With this meter, you set the switch to ohms (Ω) and press the "select" button once to choose continuity mode. (![]() )
)
 You're still testing resistance... but instead of measuring the exact ohms, all you care about is whether the circuit is open or closed ("shorted"). The meter will beep when the circuit is shorted, so you don't even need to look at the display. If you do, you'll find it showing either "OPEn" or "Shrt." Touch the probes together, and you'll see what I mean.
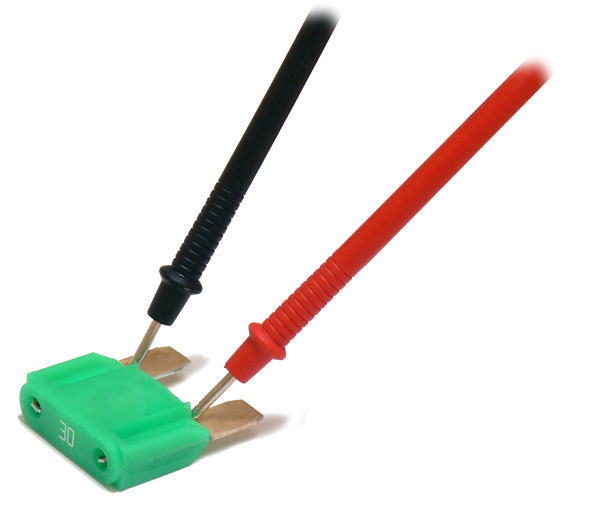
Most smaller 12V fuses have transparent bodies, so you can usually tell when they've blown, but some of the big automotive fuses have opaque bodies. Here's a 30 amp fuse that we'll test with the multimeter. Notice that I've pulled it out of its socket. Remember, never use the resistance (ohms) setting on a live circuit! OK, let's put the probes on, and... BEEEEP! Yup, it's good. If the fuse had been blown, the meter would have remained silent, and would have displayed "OPEn."
But there's one more test we ought to make, as long as we have the fuse out of its socket. What if some master fuse or circuit breaker has popped, and the fuse socket itself is not getting any power? Well, we can check on that. Switch back to the volts setting, and carefully push the probes into the fuse socket. Getting 12V? If not, there's a more fundamental problem.
Another way to test
There is a faster way to test a fuse: without removing it from its socket. Notice how the fuse shown here has metal terminals on its top (labeled) surface? Most "blade" type 12V fuses do. Well, if the fuse is still in its socket, you can set your meter to volts and touch the probes to those terminals. If you see 12V across the terminals, then the fuse is blown.
Normally the fuse acts as a short... so if it's working properly, you won't see any voltage across it. Trouble is, that's not the only case in which you'd see no voltage. What about the situation we just mentioned, where a master fuse or circuit breaker further up the line has popped, and the fuse socket itself is dead? In that case you'd also see zero volts across the fuse. Now admittedly, this rarely happens. But when it does, the shortcut test of measuring voltage across the installed fuse is going to fool you into thinking the fuse is good, when actually the fuse socket is unpowered. Me, I prefer to take the extra time to pull out the fuse and test both it and the socket separately, just to be sure.
Testing coaxial cable
Here's a simple gizmo that you can use to test coaxial cables—the kind used for cable TV, satellite TV and satellite internet connections, among other things. All you need is a double-female "F" connector (Radio Shack part #278-304, sometimes called a "barrel"), the kind used to join two cables together into a longer cable, and a two-inch piece of bare solid wire. (In a pinch, you can even use a paperclip.)
 Poke one end of the wire into the center of the barrel, then wrap the rest of its length around the outside. Presto—you have a shorted female "F" connector for test purposes.
To check a cable, we'll do two tests: first we'll check for shorts, and then we'll check for a broken connection.
First, take your suspect cable and make sure it's disconnected at both ends. Set your meter to "continuity beep" mode, or to ohms if it has no beeper. Take one end of the cable (it doesn't matter which), and put one probe on the outer ring of its connector and one on the inner pin. You should see "OPEn," or however your meter indicates "no connection."
If you get a beep or a zero-ohms indication, the cable is shorted. Most shorts happen at a connector rather than in the middle of the cable, so you could try cutting off one end and putting on a new connector—you have a 50/50 chance of success.
Now attach your shorted test connector to one end of the cable, and repeat the test. This time you're looking for a beep or a very low ohm reading to tell you the cable is good. If there's no beep, or the ohms stay high, then the cable has a broken connection somewhere—it's open. Again, if you don't want to buy a new cable, you could try replacing one of the connectors.
Measuring through insulation

Here's a trick I sometimes use when I want to see what kind of juice a wire is carrying, but I don't want to disconnect it or cut away the insulation. I stick a sewing needle straight through it, then put my probe on the needle.
IMPORTANT: NEVER DO THIS WITH A 120VAC WIRE! You could electrocute yourself. Only use this trick on wiring that you're sure is meant for 12V. If you're not sure, don't try it!
The neat thing about the needle trick is that you can get your measurement without breaking the circuit. When the needle is pulled out, the vinyl insulation closes up, so no harm is done to the wire.
Black and white
Here's something you need to know about RV electrical systems: while everywhere else in the world, red means positive and black means negative, for some reason most RVs do it differently: BLACK is positive and WHITE is negative! This counterintuitive use of color codes can get you into a lot of trouble if you hook up lights, sockets and so by connecting black to black, as you'd expect to do.
My advice: in an RV, don't trust color codes. Even if you've memorized "black to red and white to black," it's entirely possible that some workman who was having a bad day may have wired it differently. In fact, a friend of mine discovered (after blowing several fuses while trying to add an accessory outlet) that her coach was wired one way in front, and the opposite way in back! Moral: don't trust color codes. ALWAYS TEST.